

Introduction to Jenkins
In this blog post I will talk about one of the most popular and open-source automation tools - Jenkins.


At the heart of DevOps practices lies the CI-CD pipelines, and Jenkins is one of the most popular tools one can use to implement them. Jenkins is an open-source automation server that is used to automate repetitive processes during a software project.
In this blog we will discuss how you can run Jenkins inside a Docker container and will also look at how we can create a simple CI-CD pipeline.
Pulling the Jenkins image from Docker Hub and running Jenkins for the first time
docker run -p 8080:8080 -p 50000:50000 -d -v jenkins_home:/var/jenkins_home jenkins/jenkins:lts
In the command given above, we ran a docker container using the jenkins:lts image in detached mode (-d flag). We mapped ports 8080 and 50000 on localhost to 8080 and 50000 of the container. We mapped port 8080 so that we can access Jenkins UI within our web browser on localhost port 8080 & mapped port 50000 for access by Apache Tomcat. Jenkins runs in servlet containers such as Apache Tomcat. We also attached a storage volume (-v flag) to store user data and plugins.
After the command has been executed you can open your web browser and visit 'locathost:8080' and you will find Jenkins Getting Started page.
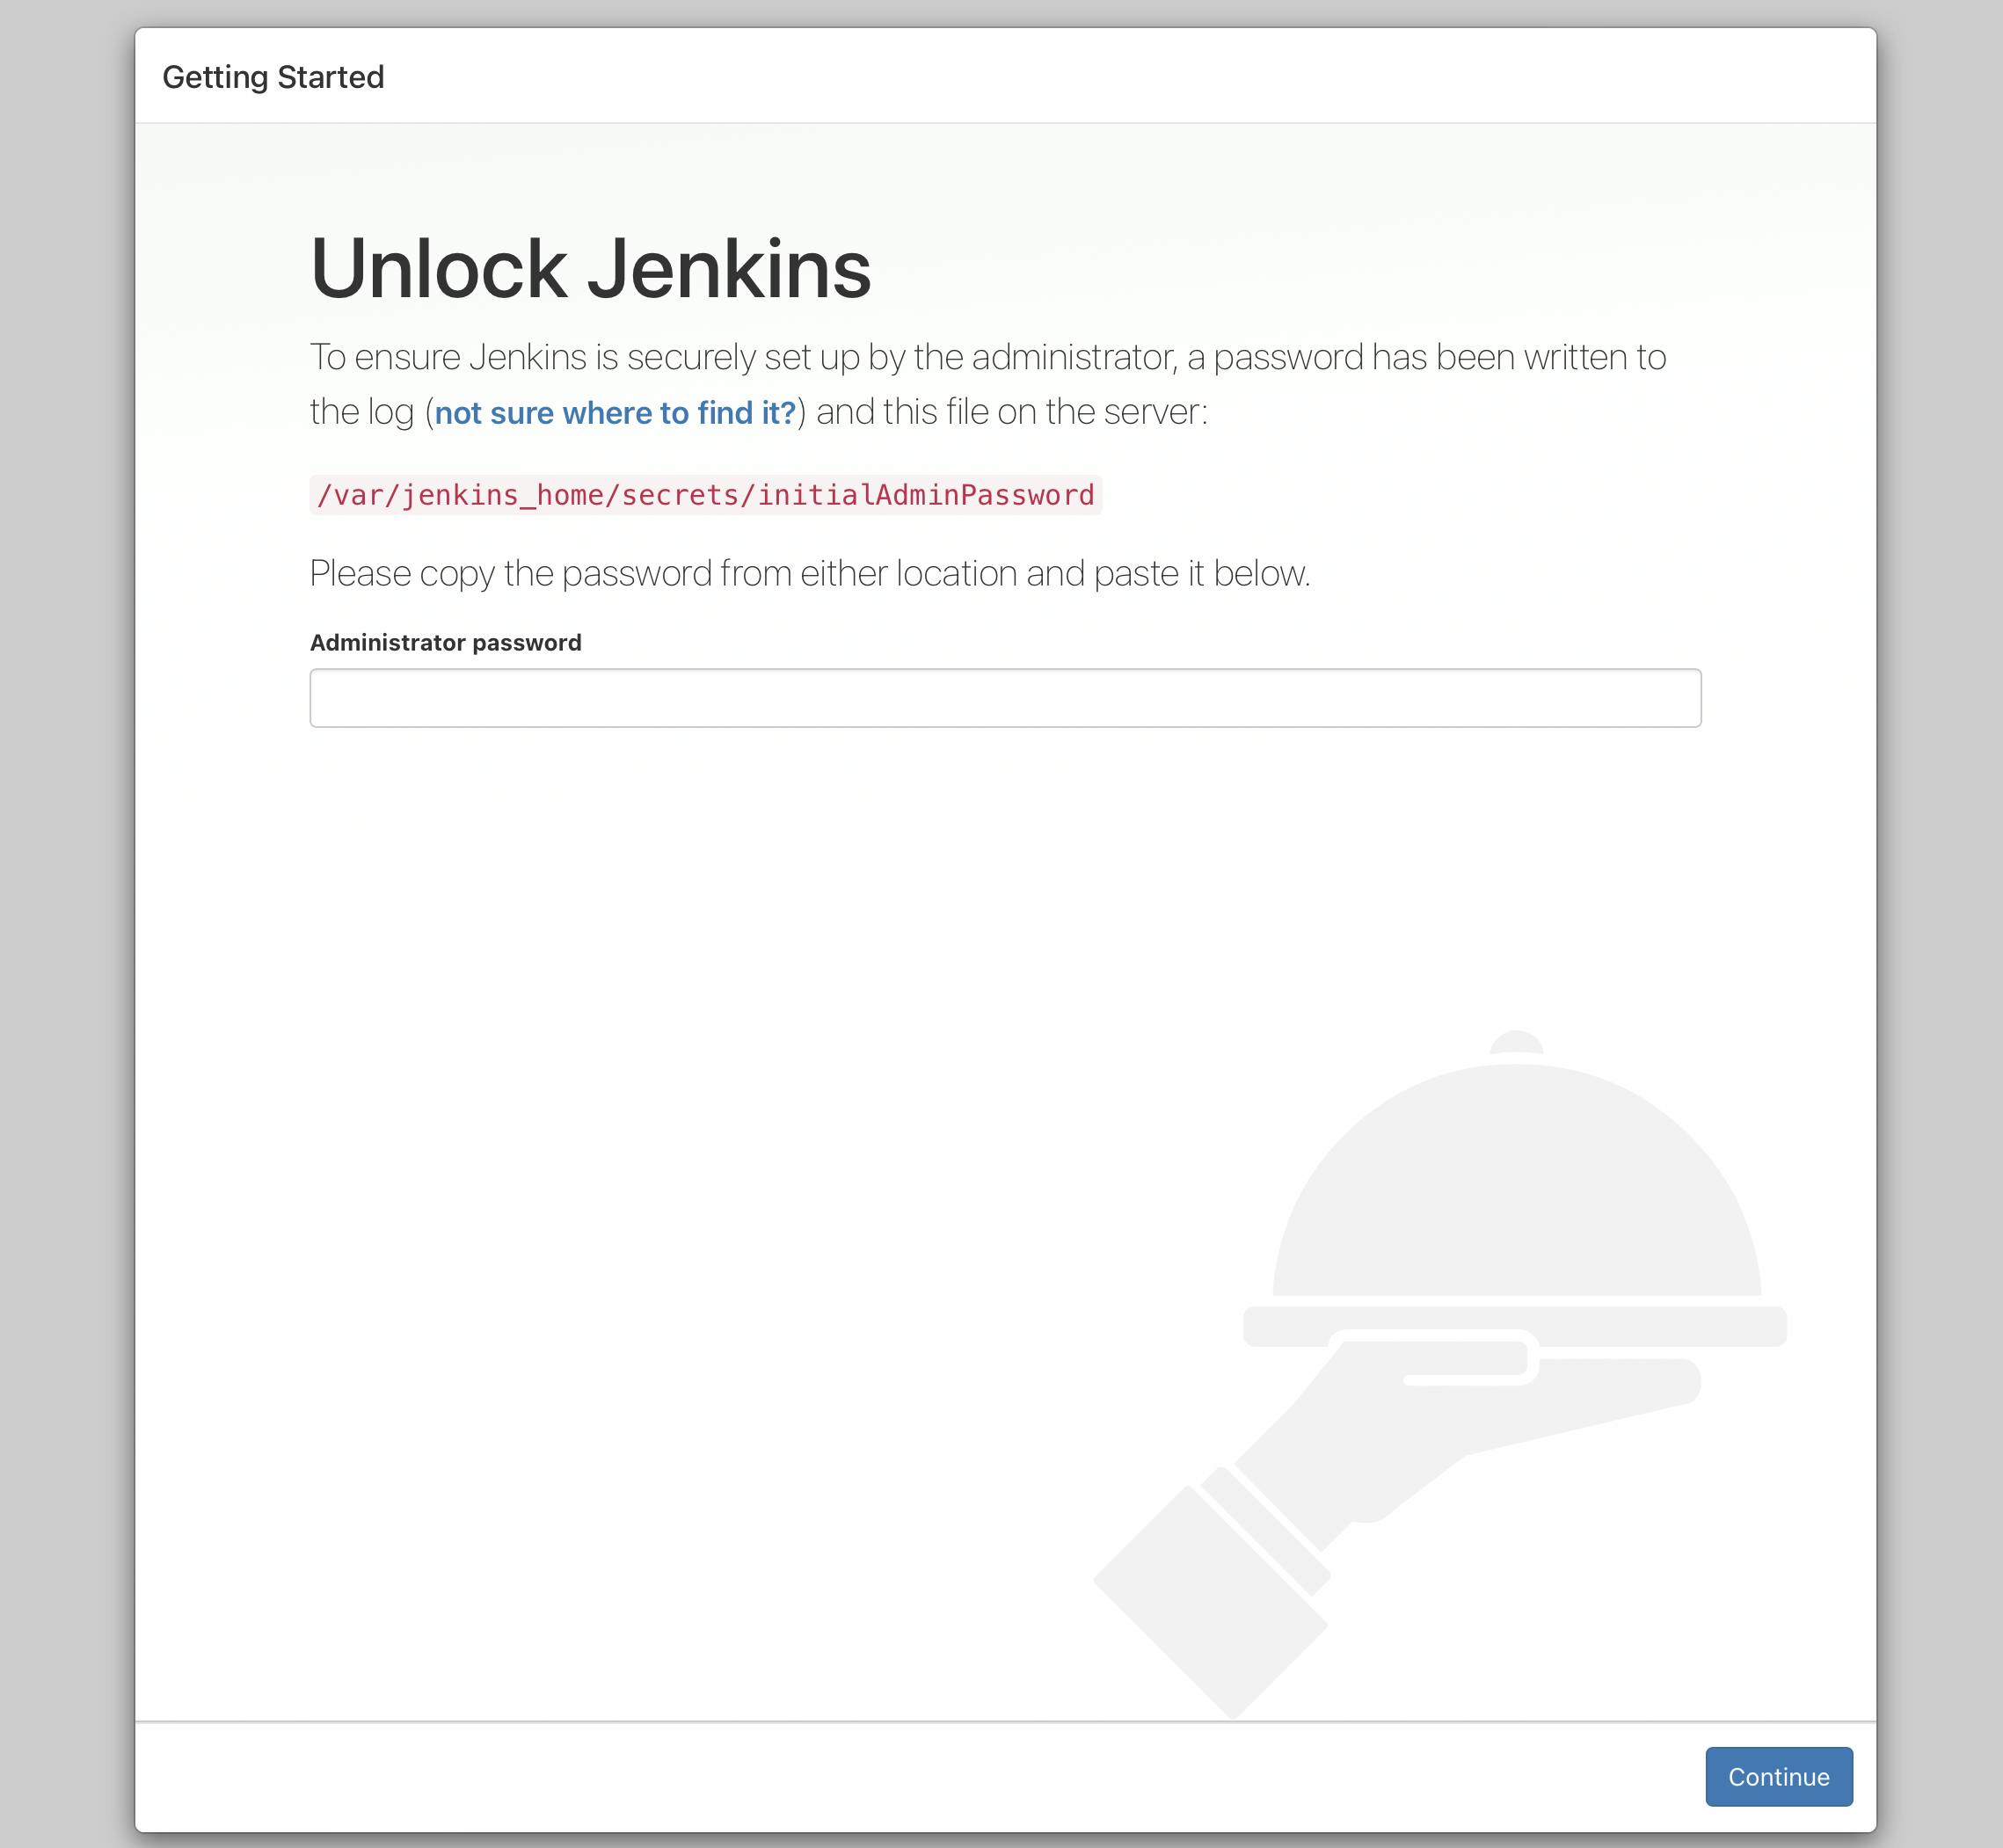 To get the admin password run the following command
docker logs <container-id>
After providing the password you can choose the option to install all the suggested plug-ins and after installation you can create a new user.
What is a Jenkinsfile
Jenkinsfile is a text file containing the definition of a Jenkins pipeline and is added to source control. There are two kinds of syntax for the Jenkinsfile -> Scripted and Declarative.
The Scripted syntax was initially introduced and is more powerful and highly flexible when compared to the Declarative syntax. On the other hand the Declarative syntax is easier to user and is therefore beginner friendly.
Simple Jenkinsfile example (Declarative syntax)
pipeline{
  agent any
  stages{
    stage("Build"){
      steps{
        echo 'building .......'
      }
    }
   stage("Test"){
      steps{
        echo 'testing .......'
      }
    }
   stage("Deployment"){
      steps{
        echo 'deploying .......'
      }
    }
  }
}
Creating a Multi-branch pipeline
- Click on new item from the left side bar menu
- Give a name for example 'my-pipeline'
- Select Multibranch pipeline option and then click OK
- In the Branch Source section link your Git repository to the pipeline and provide access credentials for the same
- Create a simple Jenkinsfile and add it to your GitHub repository
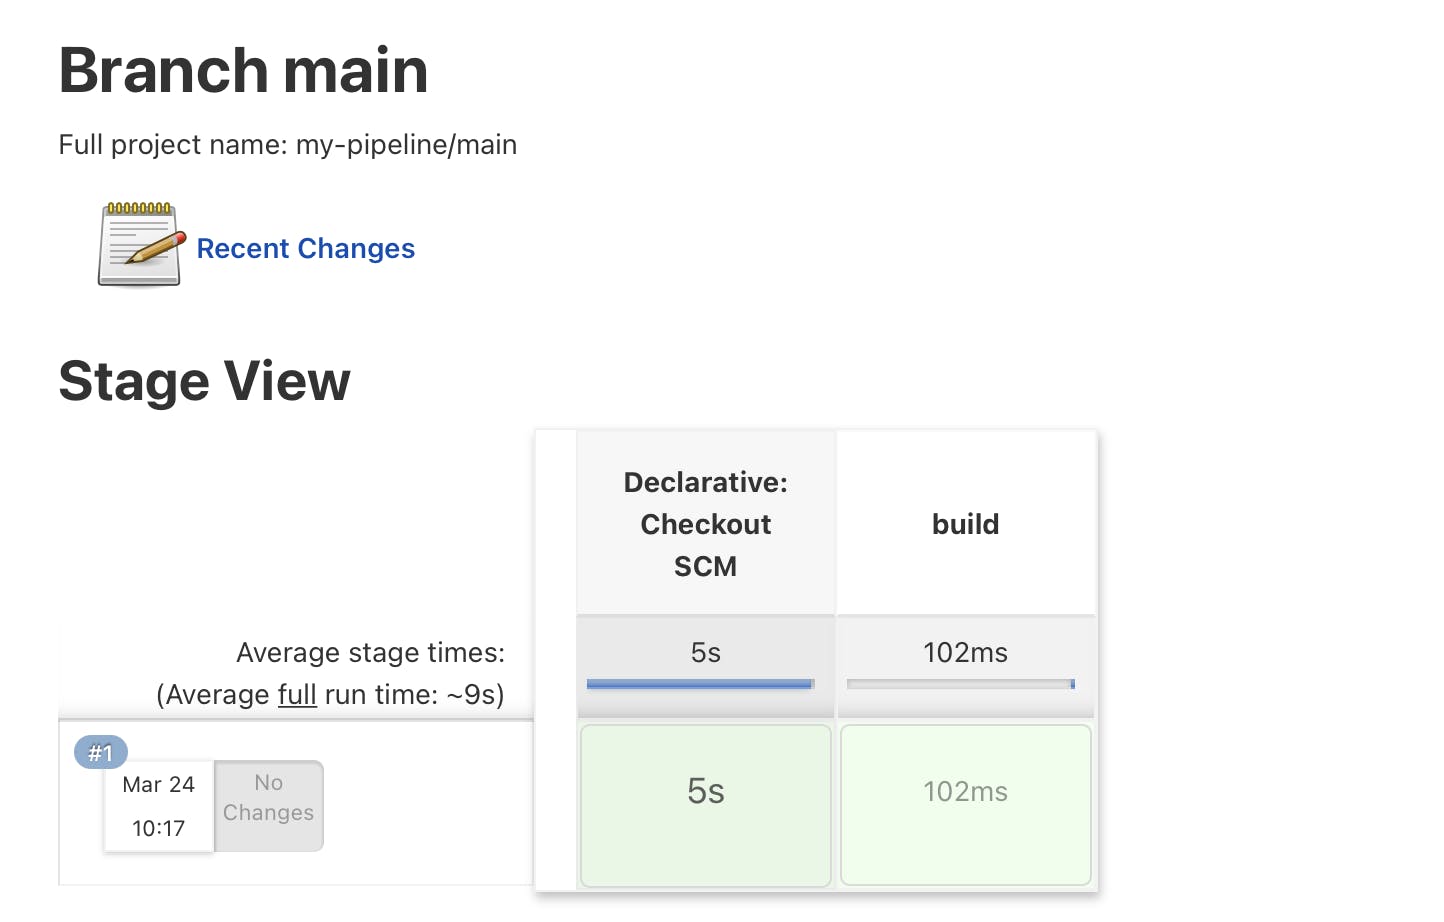
- In the side menu click on the 'Scan Repository Now' option and then click on 'Scan Repository Log'
- In the logs you will find the various processes performed by the pipeline and the status of the activities.
Automatically Trigger Jenkins Build
The ultimate goal of a CI-CD pipeline is to automate actions and therefore Jenkins can automatically build or test when changes are made to the code. There are two ways to trigger Jenkins:
- One is push notification from the version control when code changes are submitted.
- Another way is via polling, where Jenkins checks for updates after some time intervals.
In order to configure automatic builds using the push notification method one must configure both Jenkins and their version control system. Let's take GitHub as an example. In order to trigger a build after code changes one needs to configure web-hooks for the repository and then also go the Build Triggers section while building the pipeline and check the 'Github hook trigger for GITScm polling'.
In further blogs we will discuss more build and automation tools and also explore other interesting and fun DevOps practices.